
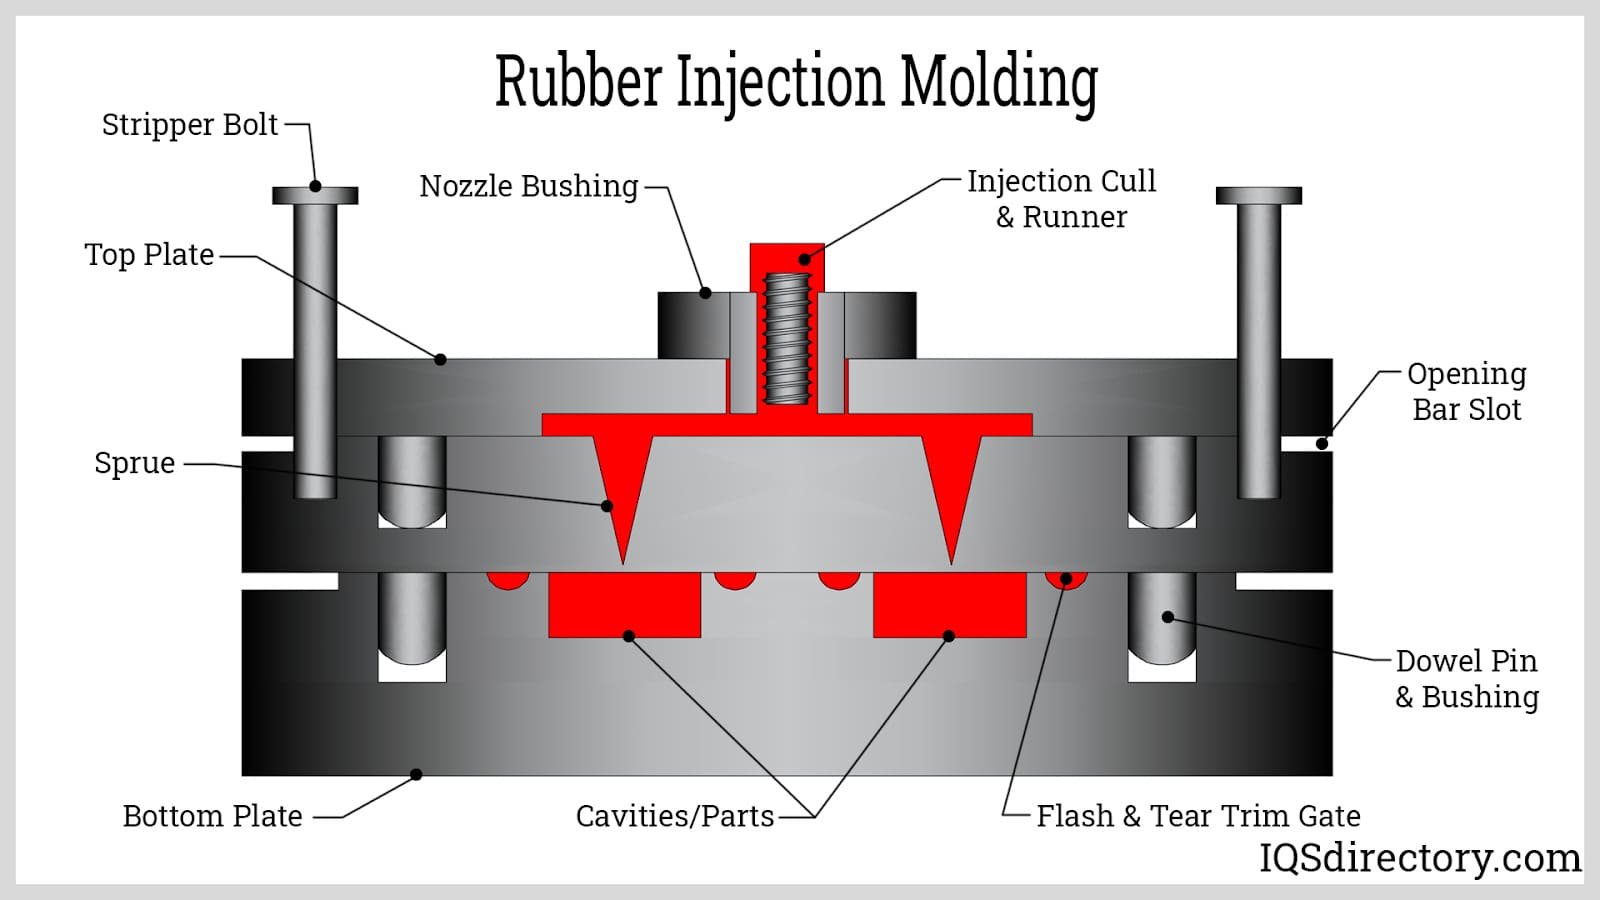

The rubber industry has grown a lot in the past of couple of decades. Rubber is product that everyone uses all around the world. Our ancestors before us would also use this product and improvise to make life easier. There isn’t a day that goes by that we don’t use rubber. It is used for toys, plates, phones, cars, etc. Major milestones in humanity are made thanks to the use of rubber science and technology. In this article, we will walk through the steps of how you could mold your own rubber.
如何制模橡胶
Step 1 – Figure out the object that has to be molded as rubber. This can be anything ranging from a pine cone which may later be used to make candles or a sculpted animal which will need to be duplicated.
Step 2 – The material to make the mold is easy to obtain. Many rubber manufacturing companies also create their own brand of rubber that is specifically meant to be molded.
Step 3 – The chosen model must then be housed with a type of boundaries. This enclosure is for holding the liquid rubber while it takes the mold shape of the enclosure. This boundary or perimeter may be created by using various everyday objects – such as a yogurt container or makeshift objects created by using foam core or hot melt glue. There should be, a 0.5 inch gap is left between the model and makeshift boundary holding it. Within the manufacturing circle, molds would typically be created by tooled metal and inserted into a machine made specifically for the molding process.
Step 4 – This important step determines the efficacy of the rubber molding process. The model has to be released from the rubber mold, where it must be sealed if the material is particularly porous or if a release agent has to be used later. The sealing of porous models is usually accomplished by using specially manufactured materials.
Step 5 – In this step, the rubber is mixed and poured into the mold. This has to be done very carefully to ensure that the rubber material is evenly filled throughout the entire mold. If the mold has not been completely filled by the material, the final product may not be the desired shape.
Step 6 – After the rubber has cured, the product has to be tested multiple times to be sure that the material has been molded to the required degree. Once the proper checks have been completed, the product would then be removed from the mold, a.k.a. de-molded, thus completing the molding process.
Learn More: http://www.wikihow.com/Make-a-Rubber-Mold
2 回复
Thank you for every other informative blog.
I strongly recommend